| INDEX | 1300-1599 | 1600s | 1700s | 1800s | 1900s | CROSS-ERA | ETHNO | |
| MISCELLANY | CONTACT | SEARCH | |
|
|
 |
 |
 |
|
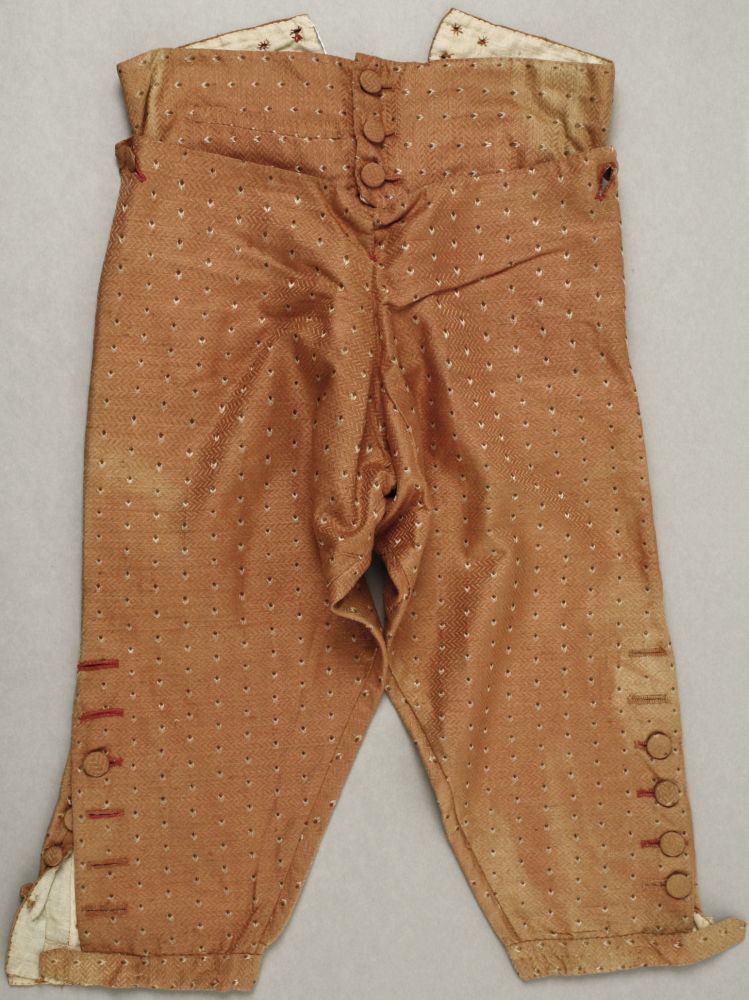
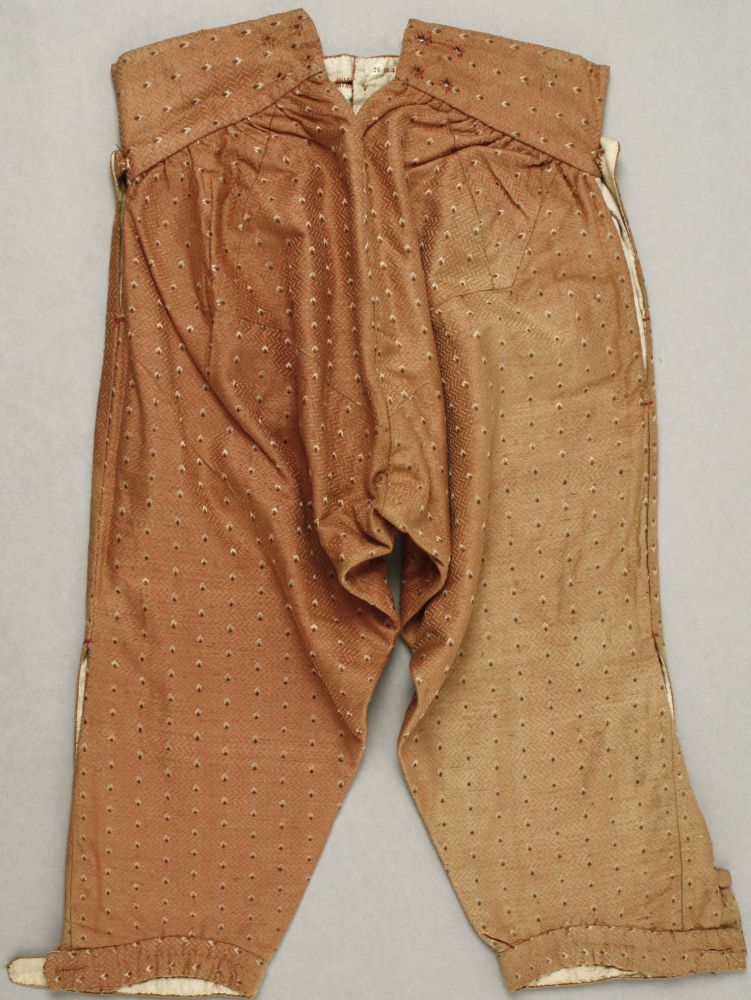
Breeches with centre opening |
The first step should be to make the pockets. They are by far the mosr difficult part of the breeches. If you don't dare to make them yet, you can cut away that part of the top edge that sticks up a bit, ignore the pocket slit, and make breeches without pockets. On the other hand: Once you've got the trick, they seem easy on hindsight. The difficulty is not even a technical one (unless you're using a sewing machine) but is solely a matter of understanding how the parts go together. If you've made a mock-up, experiment with that one first.
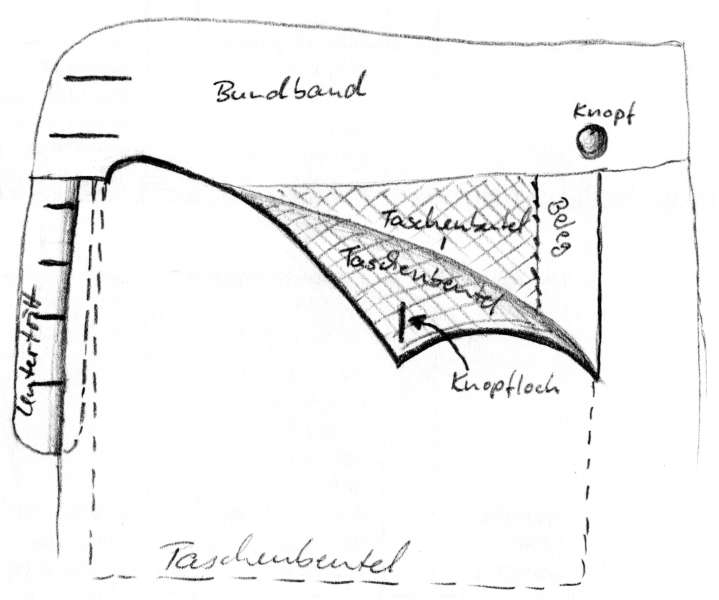
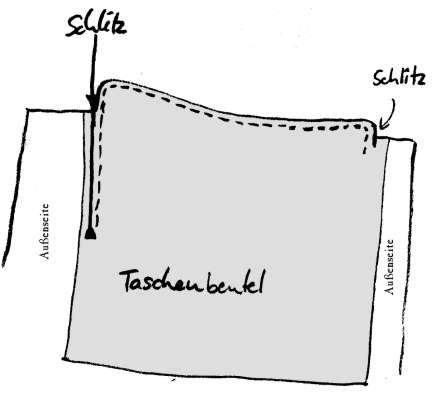
Decide how deep the pockets should be, and cut the pocket bags accordingly. The outer (front) layer of the pocket follows the edge of the aforementioned, sticking-up part, and is somewhat wider than that below. The back layer is simply a rectangle of the same width and length. Place the outer pocket layer onto the corresponding part of the breeches and sew it on, closely following the edge. Where there's a slit marked in the breeches, sew down along that slit. Cut the slit, turn the pocket bag around and iron the edges flat. On the other side of the slit, the one opposite of the pocket bag, you attach a strip of top fabric. The inner layer of the pocket bag is set behind this strip of top fabric, smoothed out on the outer layer, and sewn to it from the end of the slit, around the bag, and back to the upper edge. sketch
For upperclass breeches, make a watch pocket in the right side of the waistband. It is made as a simple slit and should sit quite hight in the waidtband. Make it as wide and deep as a period pocket watch needs without danger of falling out, even if you sit. It is not necessary that you be able to insert fingers into it as the watch will ba fastened to a band which will hang out of the pocket, serving as a handle to pull the watch out by. In most cases, the watch pocket will be wider than the waistband is high. Simply leave an opening for it when sewing the waistband lining to the waistband. The lining and interlining are simply sewn to the waistband along the top and vertical edges, right-on-right, turned and ironed.
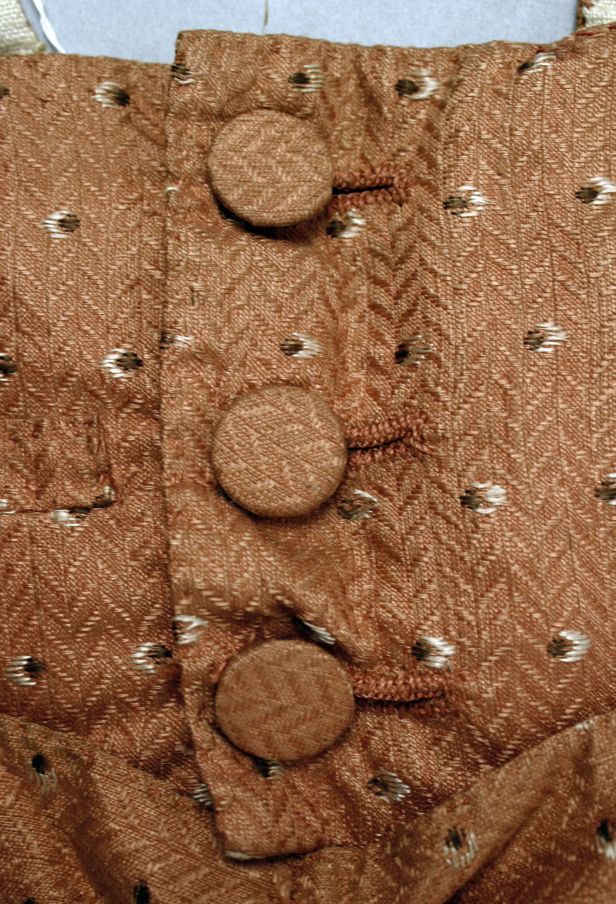
 Double
the strip for the fly, make four horizontal buttonholes in it, and set it under
the left edge of the front slit so that half of it is hidden under the top fabric,
while the other half sticks out. The buttons, which are attached to the right
side, will later be half hidden under the left side of the slit. Then sew the
front and back of the breeches together. Leave 6-8 cm open at the top of the
centre back and either seam the edges there or insert a triangular wedge. Leave
about 20 cm open along the lower end of the side seam. Gather the top edge of
the back of the breeches. Attach the waistband. On the left side, start at the
end of the fly strip that has the buttonholes. Where the pocket is, you only
sew it to the inner layer of the pocket bag. On the right side, let the waistband
extend a bit beyond the slit. Adjust the gathering in back to that the top of
the breeches fits into the waistband.
Double
the strip for the fly, make four horizontal buttonholes in it, and set it under
the left edge of the front slit so that half of it is hidden under the top fabric,
while the other half sticks out. The buttons, which are attached to the right
side, will later be half hidden under the left side of the slit. Then sew the
front and back of the breeches together. Leave 6-8 cm open at the top of the
centre back and either seam the edges there or insert a triangular wedge. Leave
about 20 cm open along the lower end of the side seam. Gather the top edge of
the back of the breeches. Attach the waistband. On the left side, start at the
end of the fly strip that has the buttonholes. Where the pocket is, you only
sew it to the inner layer of the pocket bag. On the right side, let the waistband
extend a bit beyond the slit. Adjust the gathering in back to that the top of
the breeches fits into the waistband.
The front end of each pocket should be sewn onto the waistband with a couple of small stitches, just around the curve. The other end of the pocket is now flapping loose, but not for long: Make a diagonal buttonhole into the outer upper corner of the pocket and attach a small button to the waistband to fasten the flap. Make two buttonholes into the left side of the waistband and attach six buttons to the right side of the fly and waistband (see sketch).
The knees: Ideally you've cut the strip that will carry the buttons in one with the back of the breeches. If not, attach the buttons to the back of the knee slit and set a strip with button holes under the front, just like you did with the fly. Note that the knee band is set onto the outside of the hem, rather than inserting the hem in between two layers of band as it would be done with shirt cuffs. The buttons, therefore, are distributed evenly not between hem and upper end of the slit, but between upper edge of the knee and and end of the slit. The hem of the breeches must be slightly gathered before the knee band is attached.
The legth of the knee band depends on the circumference of the leg. It should be wider than the narrowest part below the knee, but narrower than the widest part of the calf. Somewhere in the middle. Add to this the length of the flap needed for buckling, which is about 5-6 cm. The width depends on the knee buckle: Wide enough to admit its bracket, but narrow enough to be pulled through the frame. In back, the band is left hanging loose to about 3-5 cm from each end of the slit. Make a button hole in its end, wide enough to receive the bracket of the buckle. In front, the band extends beyond the slit and is pulled through the buckle to close. If you can't afford a buckle, have the knee band button closed by extending the buttoning of the slit. Never, ever make a knee band that fastens in a bow: That is pure carnival.
Chapter 4 : The coat
Wednesday, 15-May-2013 23:53:13 CEST
Content, layout and images of this page
and any sub-page of the domains marquise.de, contouche.de,
lumieres.de, manteau.de and costumebase.org are copyright (c) 1997-2022 by Alexa Bender. All rights
reserved. See Copyright Page.

GDPO


This work is licensed under a Creative Commons License.